Sweet Eats

easy healthy holiday dessert

Easy and Healthy Holiday Dessert Recipes

The holiday season and I have a complicated relationship when it comes to healthy eating. When you’re surrounded by endless platters of cookies and cakes, my willpower tends to take a holiday break. As a nutrition coach who struggles with the same temptations as my clients, I’ve learned that complete restriction isn’t the answer. Instead, I am all for mindful indulgence: thoughtful portions, daily movement, and smart substitutions when possible.

Desserts are my personal kryptonite, but I’ve developed a strategy of bringing my own healthier treats to gatherings. Not only does this keep me on track, but it also lets me share delicious, belly-friendly alternatives with others who might be fighting the same battle.

Here are 4 of my favorite dessert recipes that prove you don’t have to sacrifice taste for health during the holidays.

Naturally Sweetened Pecan Pie

Sweetened with pure maple syrup, it’s a healthier take on the classic that doesn’t sacrifice an ounce of flavor. Inspired by one of my favorite recipe blogs, Cookie and Kate, this pie proves that ‘free-from’ can be fantastically delicious. Get the recipe here!
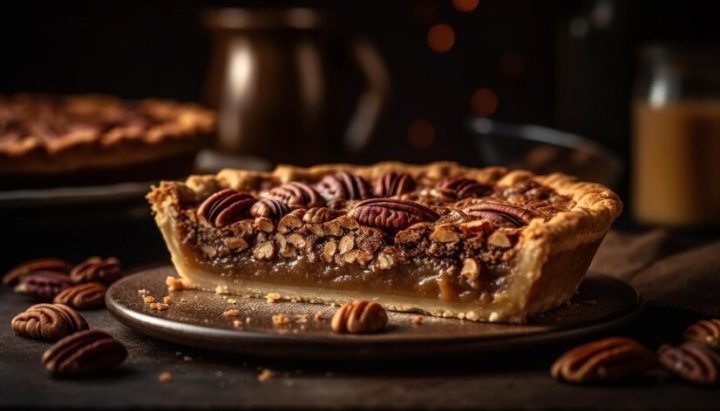
holiday dessert pecan pie

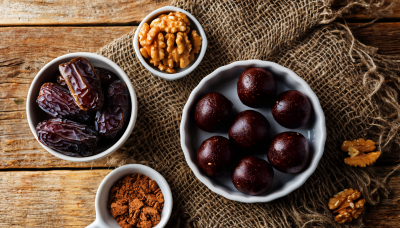
No-Bake Brownie Bites

Who says holiday desserts can’t be quick, easy, and good for you? Minimalist Baker’s fudgy bites tick all the boxes with just 7 whole food ingredients and no refined sugar. Simply toss everything in a food processor, and voila, you’ve got a healthy crowd-pleasing dessert! One delectable bite is enough to satiate your sweet tooth.
Banana Walnut Bread

Nothing says comfort like the aroma of freshly baked banana bread. This healthy version is moist, nutty, and perfect for sharing with loved ones over a warm cup of tea. Try the recipe here.
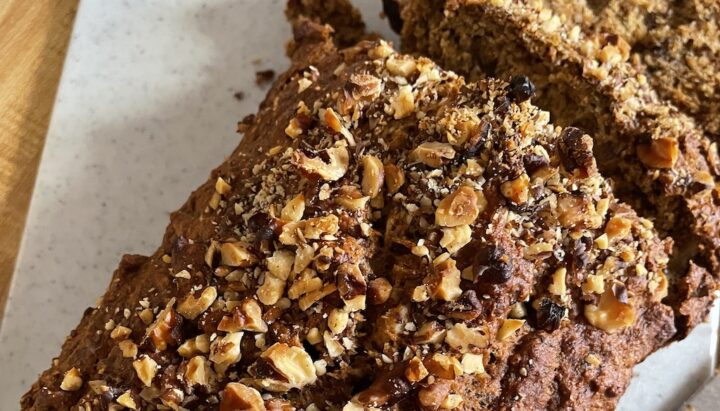
banana walnut bread

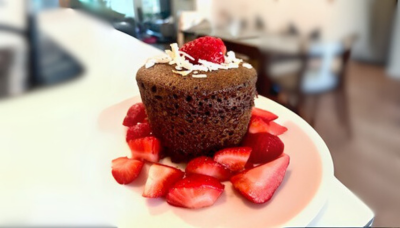
Mini Cocoa Matcha Cake

This gluten and dairy-free treat blends cocoa’s deep richness meets matcha’s earthy notes in a mini cake that’s pure comfort in every bite. Here’s the recipe link.
 

This holiday season, let’s celebrate with desserts that make us feel good inside and out. Whether you’re making them for yourself or sharing with friends and family, these recipes are sure to spread joy and wellness.

May this holiday season bring you and your family sweet moments and wonderful memories!

HAPPY HOLIDAYS!

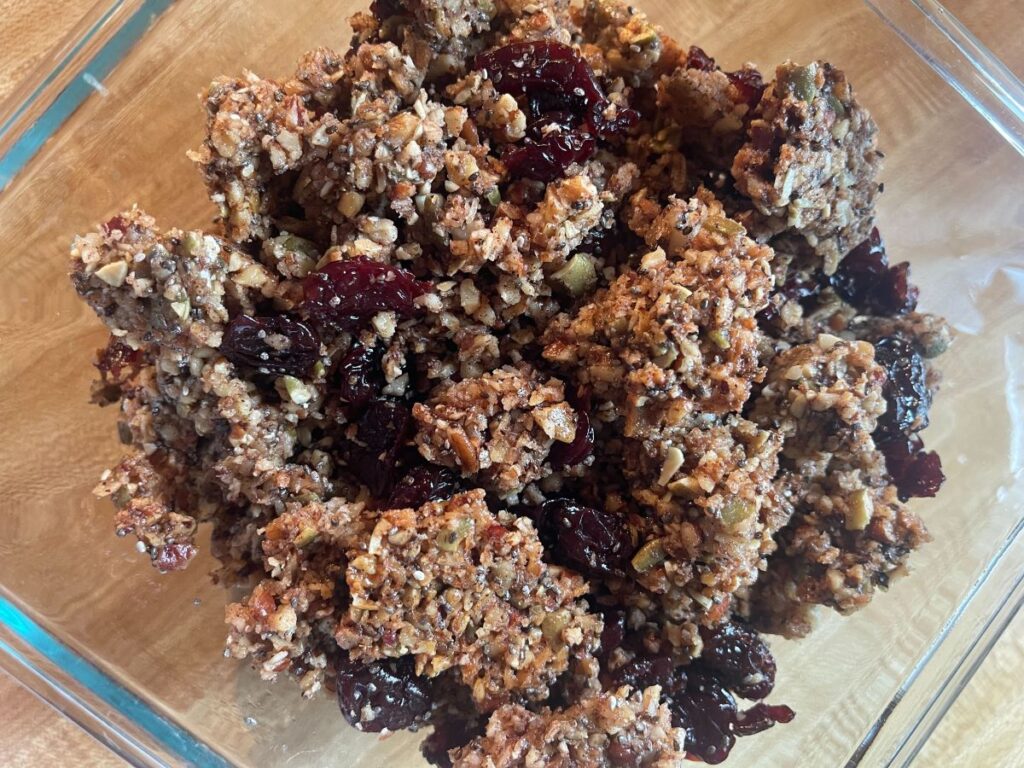
Homemade Grain-Free Granola

Homemade Grain + Gluten Free Granola

As a nutrition coach, one of the biggest challenges I face with my clients is helping them curb their sugar cravings. Granola, a beloved breakfast and snack option, often tops the list of foods I ask them to cut back on. It’s easy to understand why – that sweet, delicious crunch pairs perfectly with milk or yogurt, making it hard to resist.

The Problem with Store-Bought Granola

When shopping for granola for my clients, I’ve found that most options are:

  1. Filled with oats (which some clients need to avoid)
  2. Loaded with processed sugar
  3. Not aligned with many nutritional goals

To put it in perspective, a single cup of typical store-bought granola can contain:

  • Up to 85g of carbohydrates
  • As much as 30g of sugar

That’s an alarmingly high amount for such a small part of your daily nutritional intake!

The Search for a Better Alternative

I recently discovered Paleonola, which has one of the lowest sugar and carb contents among commercial granolas. However, its price point makes it impractical for regular use, especially for clients on a budget.

The Solution: Homemade Healthy Granola

This challenge led me to create my own version – a granola that’s both nutritious and delicious, without unnecessary processed sugar. Here’s what makes this homemade granola special:

  1. Nutrient-Dense: Packed with a variety of nuts and seeds
  2. Low in Sugar: Sweetened with just a bit of maple syrup
  3. Healthy Fats: Baked with coconut oil
  4. Gluten-Free: Naturally free from gluten, suitable for various dietary needs
  5. Customizable: Easy to adapt with different nuts, seeds, and dried fruits based on preferences or availability
  6. Cost-Effective: More affordable than premium store-bought options.

This homemade granola features a combination of nuts and seeds, sweetened with just a bit of maple syrup and baked with coconut oil. It’s naturally gluten-free and nutrient dense, packed with variety of nuts and seeds for optimal nutrition. It’s so simple to make, and you can easily customize it with different nuts, seeds, and dried fruit based on your preferences and what you have at hand. It’s crunchy, flavorful, and so easy to whip up! Give it a try!

Ingredients:

  • 1/2 cup raw walnuts
  • 1/2 cup raw pumpkin seeds
  • 1/2 cup raw pecans
  • 1/2 cup shredded coconut (unsweetened)
  • 1/4 cup coconut oil
  • 1/4 cup real maple syrup
  • 1/4 dried cherries
  • 2 tablespoons chia seeds
  • 1 teaspoon vanilla extract
  • 2 teaspoons cinnamon
  • Pinch of sea salt

Directions:

Prepare the Granola:

  1. Preheat your oven to 325°F (165°C) and line a baking sheet with parchment paper.
  2. In a food processor, blend all nuts, seeds, coconut, cinnamon and salt until fine (approx 5 seconds). Nuts should be in very small pieces but not powder.
  3. Pour the mixture in a bowl, add in chia seeds, coconut oil, vanilla, and maple syrup. Stir until everything is combined.
  4. Spread the granola mixture in an even layer approximately half inch thick on the prepared baking sheet. Tightly pack the mixture to get big clusters of granola.
  5. Bake for 25-30 minutes or until golden brown. Check in to make sure edges don’t burn.
  6. Remove from the oven and let it cool completely (this is the most important part). The granola will crisp up as it cools.
  7. Once cooled, break into clusters. Transfer the granola to a mixing bowl and toss in cherries.
  8. Transfer to an airtight container for storage.

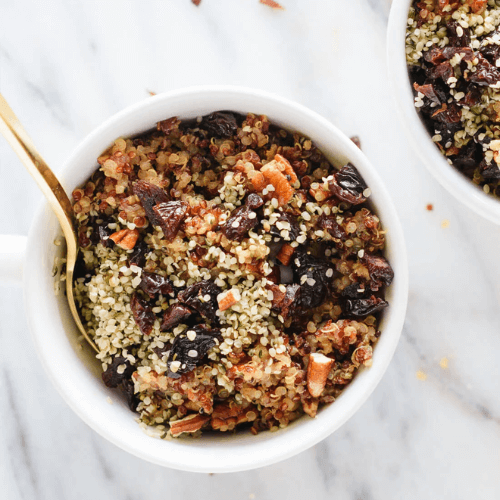
Cinnamon Toast Breakfast Quinoa

Cinnamon Toast Breakfast Quinoa

This is a great alternative to the usual oatmeal and eggs in the morning. A delicious and warm protein packed breakfast recipe I found on Cookie and Kate. Adding my favorite ingredients and toppings, this Cinnamon Toast Breakfast Quinoa is a perfect balance of nutrition and comfort.

Quinoa is a gluten free “super grain” loaded with fiber, antioxidants and numerous nutrients but more importantly provides all nine essential amino acids – making this more than just a delicious breakfast meal. Give it a try and feel free to add your favorite whole foods toppings and spices. Enjoy!


INGREDIENTS

Breakfast Quinoa
  • 1/4 cup chopped raw pecans and walnuts
  • 1 teaspoon coconut oil
  • 1 teaspoon ground cinnamon
  • 1/2 teaspoon vanilla extract
  • Tiny pinch of salt
  • 1 cup cooked quinoa
  • 1 tablespoon maple syrup
Toppings 


DIRECTIONS

  1. Warm the walnuts and pecans in a small saucepan over medium heat, shaking the pan often until fragrant and toasty (approx 5 min).
  2. Add coconut oil, vanilla extract, cinnamon and salt to the pot. Stir frequently until cinnamon is fragrant (about 30 seconds).
  3. Add the quinoa to the pot and stir to combine. Stir until the quinoa is warmed through (approx 2 min). Remove from heat and stir in the maple syrup.
  4. Transfer the mixture to a bowl and add toppings with a sprinkle of cinnamon. Serve and enjoy!
pecan pie

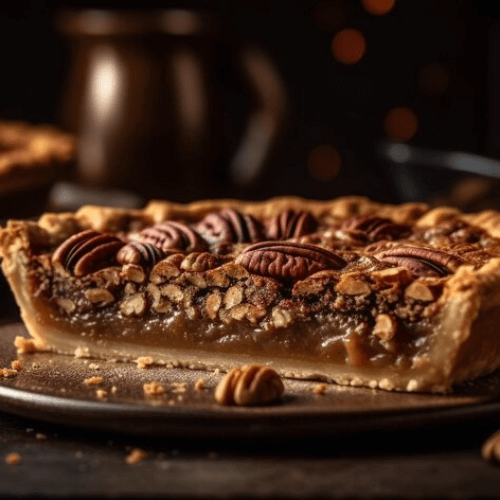
Naturally Sweetened Pecan Pie (Gluten + Dairy Free)

When I found this recipe on Cookie and Kate, I literally jumped to make it. Pecan pie is one of my favorite desserts and the fact that I get to enjoy this gluten AND dairy free AND naturally sweetened, it was exactly what I needed for the holidays. I made some small changes to the recipe to make it fit with my nutritional preferences. Give it a try…trust me it won’t disappoint. Enjoy!

SERVINGS: 8 – 10        PREP TIME: 10 minutes     COOK TIME: 45 – 50 minutes

INGREDIENTS:

  • 1 gluten-free pie crust
  • 1 3/4 cups pecan halves
  • 3 large eggs
  • 1 cup maple syrup
  • 2 tablespoons melted grass fed butter
  • 2 teaspoons vanilla extract
  • 1/2 teaspoon fine sea salt


DIRECTIONS:

  1. Remove your pie crust from the fridge. Gently take a fork and make several holes around the bottom of the crust.
  2. Preheat the oven to 375°F with racks in the middle of the oven and the lower third of the oven. Place the pecans on a baking sheet and bake them for 5 – 6 minutes. Make sure to watch that they don’t burn. Set the pan aside to cool.
  3. In a medium mixing bowl, whisk the eggs until they are pale yellow. Add the maple syrup, melted butter, vanilla extract, and salt. Whisk until well blended.
  4. Arrange the toasted pecans evenly inside the pie crust pan. Whisk the maple syrup mixture once more, then drizzle all of it over the pecans.
  5. Place the pie on a large sheet pan to catch potential drips. Place on the middle rack and bake for 40 – 50 minutes, or until crust is golden brown and the middle of the pie has puffed up.
  6. Let the pie cool for 1 hour. Carefully slice the pie with a sharp knife and serve with your favorite non-dairy ice cream.

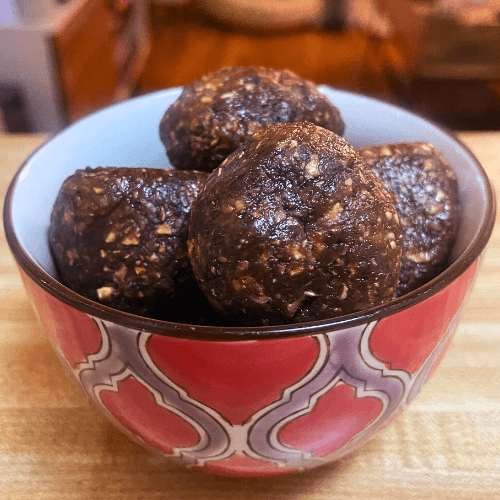
Easy Energy Balls (Gluten + Dairy Free)

Instead of reaching for another protein bar, pop 1 or 2 of these before a workout and you’ll be up for any challenge! Also great as a little pick me up or when craving something sweet, this is a great go-to. All whole ingredients and so easy to whip up.

Inspired by Love and Lemons (one of my favorite recipe blogs), I made a few changes with the ingredients making this my very own decadent energy treat! Feel free to substitute with your choice of nut butter and non dairy milk to make your own energy ball variation.


INGREDIENTS:

  • 3/4 cup gluten free rolled oats
  • 1 heaping tablespoon ground flaxseed and 3 tablespoons warm water
  • 4 tablespoons organic Sunflower Seed Butter
  • 1 tablespoon real maple syrup
  • 3 soft Medjool dates, pitted
  • 2 tablespoons coconut oil
  • 1/2 teaspoon vanilla extract
  • 1/2 teaspoon cinnamon
  • 1/4 teaspoon sea salt
  • 1/4 cup chopped walnuts
  • 1/4 cup shredded coconut
  • 1/4 cup chocolate chips


INSTRUCTIONS:

  1. In a medium pan, toast the oats over low heat until just browned around the edges.
  2. In a small bowl, combine the flaxseed and warm water and set aside to thicken for about 5 minutes. In a food processor, combine the seed butter, maple syrup, dates, coconut oil, vanilla, cinnamon and salt.
  3. Add the walnuts and pulse until combined. Then add the flaxseed mixture and mix until smooth.
  4. Then add the oats and coconut and pulse until combined. Add the chocolate chips and pulse until chocolate melts and makes the whole mixture gooey. 
  5. Roll the mixture into balls (10 – 12 balls) and chill until firm, at least 30 minutes.
  6. Store in an air-tight container in the refrigerator.

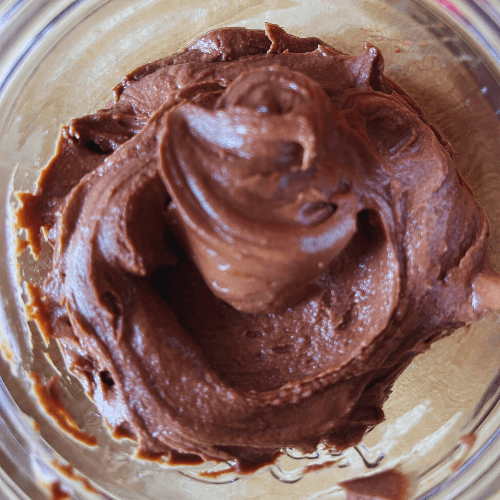
Protein Frosting

Get the same rich and indulgent taste of frosting with this gluten and dairy free option that also packs a protein punch. It does take a little arm strength to whip in the desired texture, although you can use a hand mixer, but trying to earn my sweets so I don’t mind the work.

I love to top a heaping tablespoon of Protein Frosting to a bowl of frozen mixed fruit (cherries, blackberries, raspberries, strawberries) with crushed nuts, seeds, coconut flakes and a sprinkle of Paleonola granola – making this one of my favorite desserts! Enjoy!


INGREDIENTS:


INSTRUCTIONS:

Mix all ingredients vigorously in a bowl. If too dry, slowly add more oat milk. Enjoy!

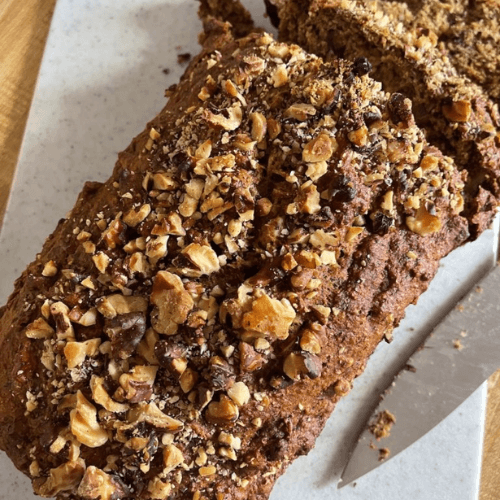
Banana Walnut Bread (Dairy-Free)

As much as I love cookies and cakes, the one thing that I find much harder to resist are sweet breads – namely zucchini, pumpkin, carrot, and most of all banana bread! My mom came upon this super simple banana bread recipe from Dr. Weil and I had to try it out with modifications, of course.

The original recipe called for whole wheat flour and canola oil. I prefer gluten free desserts and avoid canola oil altogether. Found it very challenging to find the right ingredients when baking to get the same consistency, texture and taste. After a few attempts, I found spelt flour and avocado oil as substitutes that gave a similar texture and taste. I used semi ripe bananas and raw honey for a sweetness that wasn’t too overpowering. Overall making a delicious banana walnut bread that satisfied my sweet tooth.

Check it out and let me know what you think. Enjoy…in moderation! 😉


SERVINGS: 8 – 10 slices           PREP TIME: 10 minutes         READY TO ENJOY: 40 minutes


INGREDIENTS:

  • 3 semi ripe bananas
  • 1/2 cup raw honey
  • 1 1/2 cups spelt flour (I love Bob’s Red Mill Organic Spelt Flour)
  • 3/4 raw organic walnuts, roughly chopped
  • 3 tablespoons avocado oil
  • 1 teaspoon pure vanilla extract
  • 1 1/2 teaspoons baking soda
  • 1/4 teaspoon salt


DIRECTIONS:

  1. Pre-heat oven to 350°F.
  2. Lightly oil loaf pan.
  3. Mash bananas and mix with honey, oil, and vanilla extract.
  4. Stir in spelt flour, baking soda, salt, and walnuts.
  5. Spoon into loaf pan, spreading evenly and flat.
  6. Top with handful of walnuts.
  7. Bake for 35 minutes or until center is set.
  8. Remove from oven. Cool for 10 minutes. Lightly carve around loaf with butter knife to separate from pan. Flip loaf over to gently remove. Voila and enjoy!!

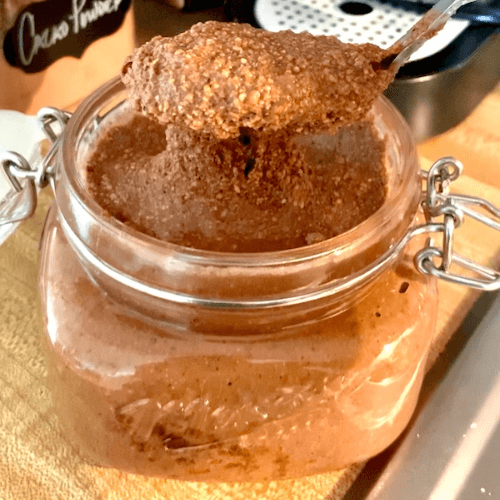
Cacao Hazelnut Cashew Butter (Gluten + Dairy Free)

Not a day goes by that I don’t have nut butter. My go-to is almond butter (Once Again is a fave). Every now and then I will splurge on Artisana’s raw nut butters and special blended farmer’s market butters. But once I made my own, there wasn’t anything quite like it at the markets anymore.

Feel free to switch up the nuts and seeds to make up your own unique combo. Some great add ins: sunflower seeds, chia seeds, hemp seeds, vanilla extract, and coconut butter. Fair warning, this is a pretty messy process. I chose to roast raw nuts for a robust and fresh flavor but also made the process messier and tad bit more labor intensive. Should you buy roasted nuts, make sure they are dry roasted and without any oil or other ingredients. Some like to refrigerate nut butters (to preserve for up to 3 weeks) but I prefer mine in room temperature.

SERVINGS: 16 oz jar         PREP TIME: 15 minutes     READY TO ENJOY: 10 minutes

INGREDIENTS:

  • 2 cups raw hazelnuts
  • 1 cup raw cashews
  • 3 Tbs cacao powder (Navitas is my fave)

INSTRUCTIONS:

  1. Pre-heat oven to 350F.
  2. On a sheet pan, spread nuts evenly and roast for 8-12 minutes. Be sure to check every minute or so after 8 minutes as they can burn pretty quickly.
  3. Make sure to remove hazelnut skin by rubbing in clean dry dish towel (this part is pretty messy). Removing most of the skin is best (not all will come off).
  4. Place nuts in food processor (or blender). Add cacao powder and blend/mix. Texture will change from mealy to gritty to creamy and smooth but it will take some time. Be patient and stir mixture every now.
  5. Scoop out and transfer from blender/processor into jar. Enjoy!

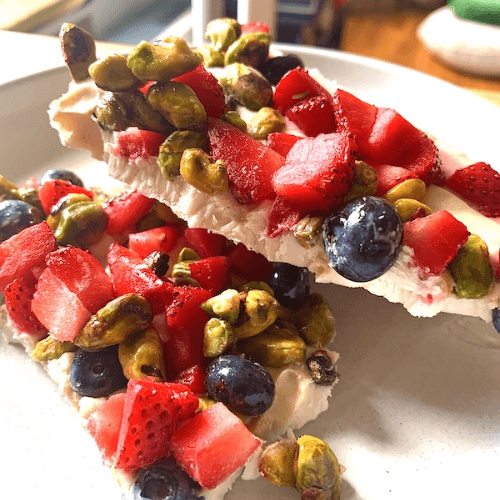
Frozen Berry – Coconut Yogurt Bark (Gluten + Dairy Free)

This is a great summer treat that satisfies any sweet tooth. Prep time is nothing but the wait does take longer than you would like…but oh so worth the wait. Feel free to switch out with your favorite berries and nuts. For larger nuts (almonds, cashews, hazelnuts), chop those up a bit more before mixing.

SERVINGS:         PREP TIME: 10 MINUTES         COOK TIME: 12 HOURS (no cooking required!)

INGREDIENTS:

  • 2 cups plain coconut yogurt (my fave is CocoYo)
  • 1/4 cup + 1 Tbs raw honey or real maple syrup
  • 2 tspn vanilla extract
  • 1/2 cup diced strawberries
  • 1/2 cup blueberries
  • 1/2 cup toasted pistachios

INSTRUCTIONS:

  1. Place aluminum foil on a baking sheet. Make sure you have enough space in the freezer to place the sheet. If not then separate into 2 smaller plates or pans.
  2. Whisk yogurt, 1/4 cup honey/syrup, and vanilla extract in a bowl.
  3. Pour mixture onto the baking sheet and spread evenly into a 1/2 inch thick layer. Make sure to not touch the edges of sheet or pan.
  4. In a small bowl, mix the berries, pistachios, and 1 Tbs of honey/syrup. Scatter this mixture of the yogurt.
  5. Place in freezer, uncovered, for minimum 12 hours.
  6. Gently pick up bark to remove from foil and cut up into medium size pieces. Bark should easily break when folded too if you want more uneven chunks.
  7. Serve immediately or freeze the rest to enjoy later.

Mini Cocoa Matcha Cake (Gluten + Dairy Free)

If you are craving a sweet treat but don’t feel like spending time baking or getting a store bought cake, then this is the recipe for you. This is instant dessert gratification in less than 5 minutes. I was so surprised how spongey and light this was that I felt zero guilt indulging it. I hope you will too!

SERVINGS: 1      PREP TIME: 3 MINUTES    COOK TIME: 90 SECONDS

INGREDIENTS:

  • 3 Tbs almond flour
  • 1 tspn matcha
  • 1 Tbs cacao powder (my fave is from Navitas)
  • 1 Tbs coconut or avocado oil
  • 1 1/2 Tbs real maple syrup
  • 1/4 tspn vanilla extract
  • 1/8 tspn baking soda
  • 1/8 salt
  • 1 large egg
  • sliced strawberries (or your fave berries)
  • coconut flakes, to garnish

INSTRUCTIONS:

  1. In measuring cup, combine almond flour, matcha, cacao powder, baking soda and salt. Mix well.
  2. Add maple syrup, coconut oil, vanilla extract and egg and whisk all ingredients together until smooth.
  3. Lightly brush 6oz mug with coconut oil the pour mixture in.
  4. Place mug in the center of your microwave and cook for 90 seconds. Insert toothpick in the center. If clean when removed, then it’s ready.
  5. With a butter knife or mini spatula, gently separate cake from the mug. Slowly flip mug onto plate to remove cake.
  6. Place right side up, garnish with coconut flakes and strawberries.
  7. Voila and enjoy! 🙂
0
    0
    Your Cart
    Your cart is emptyReturn to Shop