Try This!

Get your heart rate up with this Yoga Sequence

Known more for balance, stretch, and mind body connection, many would not look to Yoga to lose weight or to help increase cardio endurance.  Unless it’s a Bikram Yoga class (due to the high temperature in the room, your heart rate increases as a means to cool your system down) or performing an intense and fast paced yoga sequence (which is never recommended for beginners due to the likelihood of injury), the average maximum heart rate reached in a yoga class is anywhere from 95bpm-100bpm. MSN writes a good article about calories burned in yoga in comparison to other activities.

As I mentioned in my last blog post, I encouraged everyone to try Chandra Namaskar (Moon Salutation) to find a calming yoga practice. But if you’re looking to get your body warm and increase heat, Surya Nasmaskar (Sun Salutation) is the way to go. I love to add strength and power into my workouts especially when I teach yoga. Not necessary for all sequences but great if you want to cultivate some heat into your yoga practice. Check out this version of a Sun Salutation with two exercises that will increase your heart rate and get your sweat on! Try it!

Try This! Moon Salutation

In Vinyasa Yoga, a very common sequence is the Sun Salutation (Surya Namaskar). Sun Salutation is considered a Yang practice where the flow of the asanas (poses) are faster, more aggressive and challenging and is meant to create heat and energy in the body. Most yoga classes will start off with Sun Salutations as a warm up or within other sequences to push and challenge the body. The complimenting sequence to Surya Nasmakar is the Yin practice of the Moon Salutation (Chandra Namaskar). This quieting practice is slower, passive, more grounding and is meant to soothe and calm you – a perfect cool down or restorative practice.

These dueling practices hold significant benefits so depending on where your mind and body is at, choose the practice that will help bring balance to you. If you are feeling agitated and stressed, Chandra Namaskar would be beneficial.  And if you are needing a pick me up or are feeling fiery, try Surya Namaskar to strengthen and energize.

Since we are in the Fall season, where life’s pace picks up speed, I invite everyone to try Chandra Namaskar.  It’s goal is to ground and nurture your body but you will still feel your muscles benefit from the stretch this sequence gives you.

Practice this sequence 5 times on each leg and observe how your body feels. Check out next week’s blog post when I mix up Surya Namaskar with some challenging strengthening poses to really get your heart rate going!

Is a longer cardio workout worth your time?

Most are under the impression that to lose weight or fat you need to spend a good chunk of time doing cardio. Jump on a treadmill for 45-60 minutes = burn the most calories = drop the weight. That mentality does hold some truth because calorie intake vs expenditure is the key to weight loss. But the bigger question is what does that cardio workout consist of?

Low intensity steady state (LISS) cardio workouts are often what you see in the gym. This type of workout consist of purely low to moderate type of exercise. An example would be walking on the treadmill or riding a bike and being able to hold a conversation. When considering our body’s energy system and what it uses for fuel, LISS does help with burning fat as a whole. At a lower heart rate (120 beats per minute or less), your energy source is primarily body fat. Once your heart rate starts to climb (140 bpm +) and you begin to fatigue, your body will start to look for other sources of fuel such as blood sugar and muscle glycogen.  When your heart rate reaches a consistent 150-160 bpm for 45-60 minutes, your body will revert to using fat as fuel. Sounds great when you’re focused on losing fat. However, in the initial weeks of LISS cardio workouts, you will see a change but your body quickly adapts, your metabolism will plateau, and eventually the weight loss will cease. That same workout will be what your body will use simply to maintain.

If one of your goals is to increase strength and muscle tone while losing fat, then LISS aren’t the workouts for you. During long periods of LISS, after it has used fat as fuel, your body will start to search for glycogen.  Once your body is depleted of glycogen (mainly due to improper diet), its next source will be protein.  Once it starts to use protein, your body begins to waste its muscle, known as catabolism.  This works against all the strength training that one does for that toned and sculpted look.

Consider high intensity interval training (HIIT). This method of exercise allows for high intensity training alternated with short periods of recuperation or low intensity training. An example of HIIT would be running at a fast speed on a high incline for 1-2 minutes followed by a moderate pace walk or rest. Originally developed by track coaches to train their runners for speed, HIIT has scientifically proven to burn more body fat – in less time- than LISS workouts. The main reason for this is due to the great calorie burn that’s maintained after the workout is over, better known as EPOC (excess post-exercise oxygen consumption). HIIT workouts require muscle strength and endurance.  Once you develop muscles and continue to strengthen them, your body burns calories even when you’re sitting around doing nothing. This, in turn, helps to increase your metabolism. This “resting” metabolism helps muscle cells promote fat burning and prevent fat storage.
Win-Win!

This doesn’t mean that LISS workouts are not effective. They’re actually great for beginners that have just started a fitness routine and for those that may not be ready for the intense interval workouts.  But if you’re looking to maximize your workouts (especially those that have limited time), ditch the long cardio workouts and TRY THIS! on a treadmill. Have fun!

1. Walk at 3.5 speed on 3.0 incline (1 min warm up)
2. Light jog at 4.5 speed on 5.0 incline (1 min warm up)
3. Run at 7.0 – 11.0* speed on 10.0 incline (1 min)
4. Walk at 3.5 speed on 10.0 incline (2 min)
5. Run at 7.0 -11.0* speed on 8.0 incline (2 min)
6. Walk at 3.5 speed on 8.0 incline (2 min)
Repeat steps 3-6 two more times and cool down with a 3.5 walk on 3.0 incline for 2 minutes. And don’t forget to stretch!
*Depending on fitness level, minimum speed is 7.0 or maximum speed is 11.0.

Chaturanga…the right way!

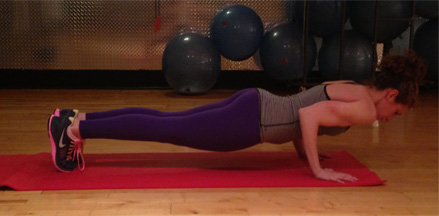
Chaturanga Dandasana is a challenging asana that’s an essential part of many different yoga practices. Also known as Four-Limbed Staff Pose, the whole body is parallel to the floor, stiff as a staff (spine) with the four limbs equally supporting the body. This posture requires complete body integration.

Jessica in Chaturanga

A perfect Chaturanga

Chaturanga is a key part of the Sun Salutation sequence that strengthens your arms, chest, and wrists and is a great preparation for arm balances. Many students attempt the full posture without fully understanding the pose or taking the time to practice the strengthening components to build the foundation. Needless to say, majority of students are practicing this pose incorrectly.

Here are some common mistakes you will see in Chaturanga:
1. Anterior rotation of the shoulders: Due to weakness in the upper body. Shoulder heads roll forward as elbows bend to lower down.
2. Collapsing in the chest: If shoulders roll forward, this creates a rounding in the upper back and the chest to cave in.
3. Deep arch in the lower back: Happens when abdominals are not engaged. Think plank when you begin to lower your body down.
4. Sagging hips: This happens because legs are not engaged to help support the lower body.

A great modification is to drop the knees to the floor and then lower into the pose.  This will help to focus on strengthening the arms, back, and chest before you bring in the legs.

TRY THIS! This is a great technique that will guide you into the posture, strengthen all the muscles involved, and to slowly build a solid foundation to do Chaturanga the right way!

Crunch vs Plank…who wins?

When you hear the word core, you automatically think of the belly area. However the core makes up so much more than just your midsection. The major core muscles are the pelvic floor muscles, transversus abdominis, multifidus, internal and external obliques, rectus abdominis, and erector spinae. The minor core muscles include the latissimus dorsi (lats), gluteus maximus, and trapezius. Functional movements are highly dependent on the core as its main function is to support and majority of your power come from this area. Lack of core development can lead to misalignment of your spine and other extremities eventually causing injuries. There are so many core exercises out there but crunches and planks are two of the most popular.

These two exercises are infamous for being performed in poor form. Just today on the gym floor I spotted someone trying to perform a crunch but all I see is their head bobbing up and down.  Ironically right next to them is someone attempting a plank with their butt up in the air. What is the point of these exercises if not done right or if you’re injuring yourself doing them? And which of the two is more effective in strengthening your core?

THE CRUNCH
A six pack is synonymous with doing hundreds of crunches a day.  However the kind of crunch that you see in the gym or maybe even do yourself, is a curl of your torso where you round your spine so much so to lift your shoulders off the floor and repeat several times to feel the burn in the abdominal area. Crunches work the rectus abdominis (the long, flat muscle that extends vertically from the pubis to the 5th, 6th, and 7th rib and is responsible for flexion of the lumbar spine). That “flex” movement places unhealthy pressure on your back at its weakest point – the back of the spine which has the most nerves (with the highest risk of nerve damage) and the part that bends and strains during a crunch. The shape of your back in a crunch (the letter C) is exactly the opposite of what your spine is supposed to be – straight.  So those hundred of crunches you do are merely reversing proper form of your spine.  In addition, your vertebrae and disks are compressed leading to potential nerve pinching and damage, changing the mechanism of your spine and the muscles that support its structure. The spine is meant to be in a neutral position, not flexed, so why torque your body into that C shape? If you do perform a crunch, use a stability ball for support (and intensity) and lift your torso up with a straight spine.

THE PLANK
Looks deceptively simple but once the second hand hits 20, gravity takes over and your body will quiver with effort to keep itself up in this isometric core exercise. An isometric exercise is a type of strength training in which the angle of the joint and the muscle length does not change during contraction. The primary muscles worked in planks are the rectus abdominis, transversus abdominis and erector spinae. Secondary muscles worked are deltoids, upper back muscles (trapezius, rhomboids), and lower body muscles (glutes, quadriceps).  Sounds (and feels) like a full body exercise to me! The main action in holding plank is the drawing in of your abdomen toward your spine.  This action strengthens the deeper muscles of the abdomen (transversus abdominis) that support the spine and help to keep it erect.  These muscles are also the source for power movements performed in sports and dynamic/ballistic exercises.

WHO WINS?
PLANK! Train your abdominal muscles to do the job they are designed to do – keeping your spine straight and secure, and providing power and stability for every day functioning. Think of your abs as a brace – it’s there for support. Replace those sit ups and crunches with planks instead.  Perfect your plank form to strengthen your core and you will find that not only will you feel stronger in every day moves but your posture will be straighter.There are so many variations of planks (front planks, side planks, moving planks)…all working every inch of your core.

TRY THIS! Front plank (hold for 10 seconds) to moving plank (5 forward and back) to side plank (hold for 10 seconds).  Repeat each side 3x for 3 sets.

Key Points of the exercise:
– Make sure to line up your shoulders directly above your elbow when holding plank.
– Keep your hips at the same height of your shoulders. Engage your glutes and quadriceps.
– When moving in plank, make sure to focus on rolling forward and back on your toes, bringing your shoulders in front and behind the the elbow line.
– In side plank, be sure to place your feet one in front of the other (instead of stacking them) and engage through the same leg side (right arm side plank- engage the right leg) and lift the hips up to work the external obliques.

Give this exercise a shot and let me know how you do! Have fun!
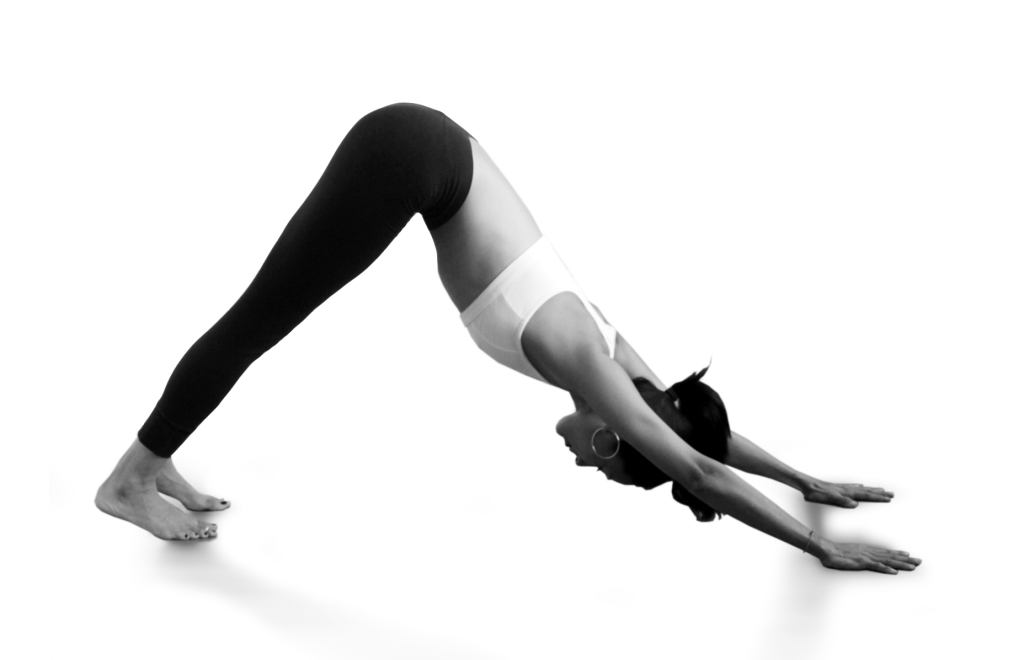
TRX Mountain Climbers

A great cardio and core exercise rolled into one. TRX suspension training will give you a total body workout . Developed by a marine in the US Army, parachute straps make up this simple piece of equipment that will transform your workouts.

Take these important steps to set up in proper form:
1. Adjust the TRX straps so the foot cradles are approximately 12 inches from the floor.
2. Line up the straps so they hang directly under the anchor point
3. Stand on your knees and slowly insert one foot at a time into each foot cradle.
4. Place your hands directly under your shoulders with your elbows slightly bent.
5. Lift your knees up into a plank position. Pull your belly into your back and press the floor away with your hands.

Now you’re ready to start the exercise:
1. Draw the right leg in towards your belly.  Extend the right leg back and bring in the left leg.
2. Repeat this 5x on each leg being sure that your belly is tight, your hips are even, and your arms are actively pressing into the floor.
3. Start in plank pose and draw the left leg slightly to the left towards your left arm aiming for the tricep.  Lightly tap the arm and extend the leg back.  Repeat 5x and switch to the right leg.
4. Finish up with mountain climbing with alternate legs (Steps 1+2).
5. Slowly lower your knees down after each set and rest for 30 seconds. Repeat for 3 sets.

Main Focus: Cardio Exercise and Core Strengthener
Primary muscles: Lower body muscles (glutes, quadriceps, hamstrings)
Secondary muscles: Upper body muscles (chest, shoulders, triceps)
Stabilizing muscles: Abdominal muscles (tranverse abdominis, rectus abdominis, and lateral obliques)

TRY THIS! Insert this exercise into your weight training routine to get your heart rate up and strengthen your core. 

0
    0
    Your Cart
    Your cart is emptyReturn to Shop