Savory Eats

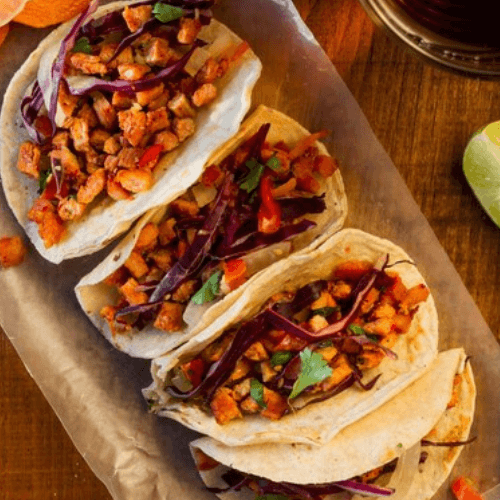
Sweet Potato Breakfast Tacos

Craving something healthy yet super satisfying?  These Sweet Potato Tacos are IT! I came across this recipe on Goop and made some modifications to meet my taste buds’ needs ;). Crispy za’atar-seasoned sweet potatoes with fluffy scrambled eggs and crisp purple cabbage, creating a perfect harmony of flavors and textures. The tangy sumac-tossed red onions add a zesty kick, while the creamy avocado tahini sauce ties everything together perfectly.

These tacos are more than just delicious – they’re a great way to add variety to your meals and pack in essential nutrients. The sweet potatoes offer complex carbs for sustained energy, while the eggs provide high-quality protein to keep you full.. It’s the ideal combo for a power-packed breakfast that’ll fuel your day.

The best part? These versatile tacos are a breeze to whip up, making them ideal for breakfast, lunch, or dinner. I also really enjoy eating with my hands so this was a win on all levels for me. Give it a go!


INGREDIENTS:

  • 2 tablespoons avocado oil
  • 1 large sweet potato, diced small
  • 4 – 6 eggs
  • sea salt
  • 1 teaspoon za’atar
  • handful of chopped purple cabbage
  • small handful of cilantro leaves
  • ¼ red onion, thinly sliced
  • ½ teaspoon sumac
  • 4 – 6 grain-free tortillas
  • Avocado Tahini Dip


DIRECTIONS:

  1. Heat a nonstick skillet over medium heat. Add the avocado oil, sweet potatoes, and a pinch of salt. Cook, stirring frequently, for about 10 – 12 minutes or until the sweet potatoes become browned on the outside and fork-tender.
  2. Add the za’atar and let cook for another minute or so, then remove from the heat. While the potatoes cook, toss the thinly sliced onions with the sumac and a pinch of salt and set aside.
  3. In a separate pan, drizzle avocado oil and scramble 4-6 eggs lightly seasoning with za’atar, salt and pepper.
  4. To assemble the tacos, warm the tortillas (either in a pan or over an open flame if you prefer a little char). Swipe each tortilla with the avocado tahini sauce, then top with a mound of sweet potatoes and eggs. Finish with some of the sumac red onions, a squeeze of lemon, and cilantro. Enjoy!
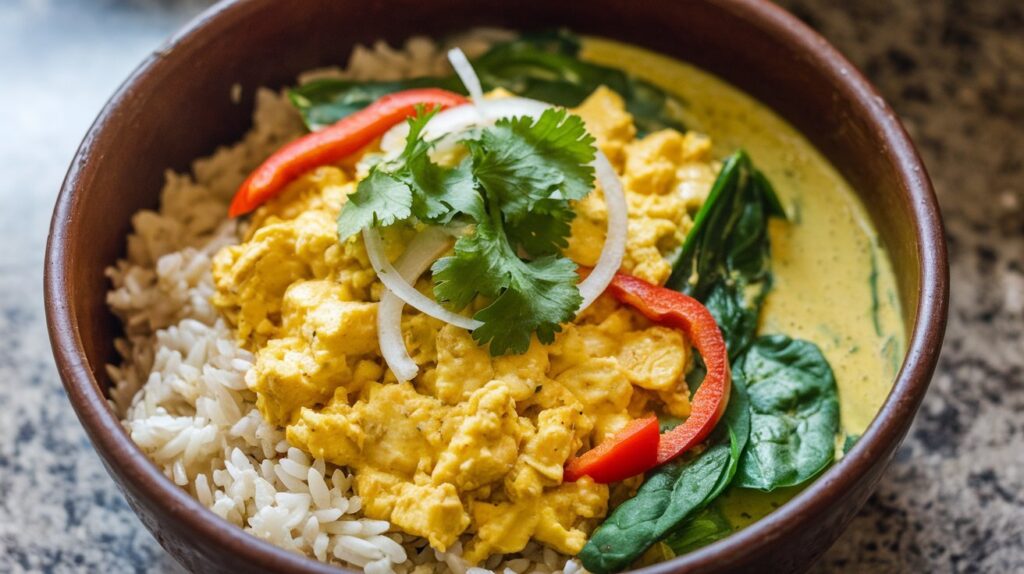
Tofu Curry with Coconut Rice

Tofu Curry with Coconut Rice

This Tofu Curry with Coconut Jasmine Rice combines nutrition and flavor in a super satisfying meal that reminds me of home. After researching various curry recipes, I developed this version using essential spices and adding my own twist. The dish features tofu as the main protein, but it works well with a light white fish (cod, halibut) or grilled chicken too.

I typically use whatever vegetables I have on hand, making it a versatile option for using up ingredients. The creamy coconut milk ties everything together, creating a rich curry that pairs perfectly with coconut jasmine rice.

This recipe offers a balance of protein, vegetables, and complex carbohydrates, proving that a nutritious meal can also be delicious and filling. It’s become a regular in my meal rotation due to its flavor and simplicity. Especially for someone always on the go, simple and nutritious meals are always at the top of my list. Give it a go!

Ingredients:

For the Tofu Curry:

  • 1 box extra firm tofu
  • 1 can coconut milk
  • 1/4 cup water
  • 1 red bell pepper, thinly sliced
  • 1 large onion, thinly sliced or diced
  • 7 garlic cloves, minced
  • 2 handfuls of fresh spinach
  • Cilantro, for garnish
  • 2 tablespoons avocado oil
  • 1 teaspoon turmeric
  • 1 teaspoon cumin
  • 1 teaspoon garam masala
  • 1 teaspoon coriander powder
  • 1 teaspoon Umami flavoring
  • salt and pepper, to taste

For the Coconut Jasmine Rice:

  • 2 cups Jasmine rice
  • 1 can coconut milk
  • a pinch of salt

Directions:

  1. Prepare the Coconut Jasmine Rice:
    • Rinse the jasmine rice under cold water until the water runs clear.
    • In a pot, combine the rice, coconut milk, and salt. Bring to a boil, then reduce the heat to low, cover, and let it simmer until the rice is tender and the liquid is absorbed (about 15 minutes). I love and use my Zojirushi rice cooker but it does take 60 minutes.
    • Fluff the rice with a fork and set aside.
  2. Cook the Tofu Curry:
    • Wrap the block of tofu in a towel, press and squeeze until excess water is removed. Then break the tofu block into small pieces creating a scrambled texture.
    • In a large pan, heat avocado oil over medium heat. Add the tofu and cook until slightly golden. Remove the tofu and set aside.
    • In the same pan, sauté the onions until they’re soft and translucent. Add the red bell peppers and cook until they start to soften. Add tofu back into the pan.
    • Pour in the coconut milk, add all spices and bring the mixture to a simmer.
    • Add fresh spinach. Stir gently until the spinach wilts and everything is well combined.
    • Let the curry simmer for a few more minutes until it’s heated through and flavors are well integrated.
  3. Assemble the Dish:
    • Serve the tofu curry over a bed of coconut jasmine rice.
    • Garnish with fresh cilantro for a burst of freshness.
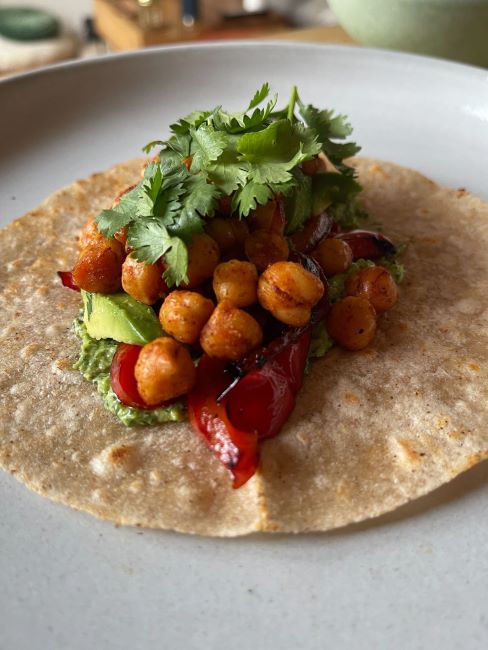
Chickpea Tacos (Gluten and Diary Free)

Chickpea Tacos (Gluten + Diary Free)

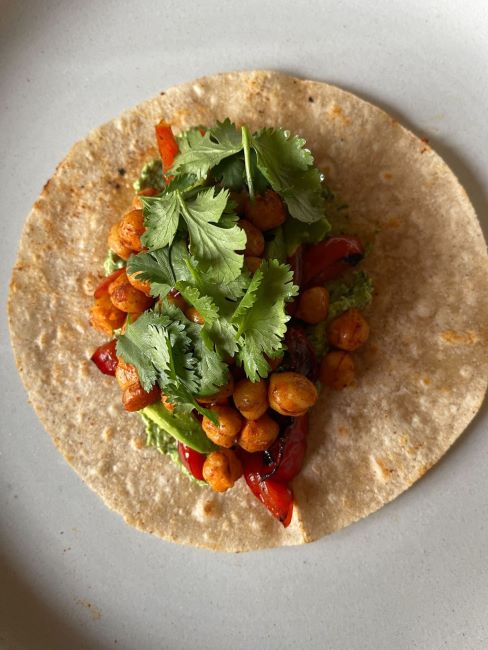
Recently, I’ve been leaning towards vegetarian meals so when I came across this recipe on Rainbow Plant Life, I had to give it a try with some additions and modifications, of course. This chickpea taco recipe is a delicious and healthy alternative, perfect for anyone looking for a flavorful plant-based option. Inspired by vibrant, fresh ingredients, these tacos are easy to make and packed with nutrients. They pair wonderfully with my creamy Cilantro Hemp Pesto from a previous post, adding a unique twist that complements the savory chickpeas and crispy red peppers. Top the chickpeas with your favorite taco fillings over a cassava or almond flour Siete tortilla for a gluten and dairy free dish that is so satisfying and tasty. Enjoy!


INGREDIENTS:

For Chickpea Taco filling:
  • 1 can of chickpeas, drained
  • 1 small red pepper
  • 2 teaspoons avocado oil
  • 3/4 teaspoon salt
  • 1/2 teaspoon smoked paprika
  • Pinch of cayenne pepper
  • 1 medium lime
  • Cilantro Hemp Pesto

For serving:

DIRECTIONS:

  1. Transfer chickpeas to a clean dish towel or paper towels and gently pat dry, being careful not to smush them. Allow them to dry for 10-15 minutes. Make sure chickpeas are well dried before cooking.
  2. While waiting for chickpeas to dry, slice the red pepper into thin slices. Brush a pan with 1 teaspoon of avocado oil and stir-fry on medium heat until peppers are tender and slightly charred. Remove from heat and set aside.
  3. Add 1 teaspoon of avocado oil and brush the pan to fully coat the non-stick surface. Set on medium heat. Once the pan is hot, add chickpeas and spread evenly in one layer. Cook undisturbed for 2 – 3 minutes, allowing them to brown. Then toss for another 2 – 3 minutes until chickpeas are golden brown and blistered in some spots.
  4. Add salt and spices and toss well to coat all chickpeas. Cook for another 4 – 5 minutes, tossing chickpeas to allow flavors to blend and absorb. Remove from heat, squeeze in lime, and lightly toss again. Set aside.
  5. Prepare the Cilantro Hemp Pesto and place in a small sauce bowl.
  6. On medium heat, place tortillas on a non stick pan and heat for 20 – 30 seconds on each side, flipping 2 – 3 times until certain spots are charred but the tortilla is still soft.
  7. Assemble tacos by spreading the Cilantro Hemp Pesto on the tortilla, then top with chickpeas, red peppers, avocado, cilantro, a squeeze of lime, and a drizzle of olive oil.

Chickpea Tacos (Gluten and Diary Free)


Enjoy!

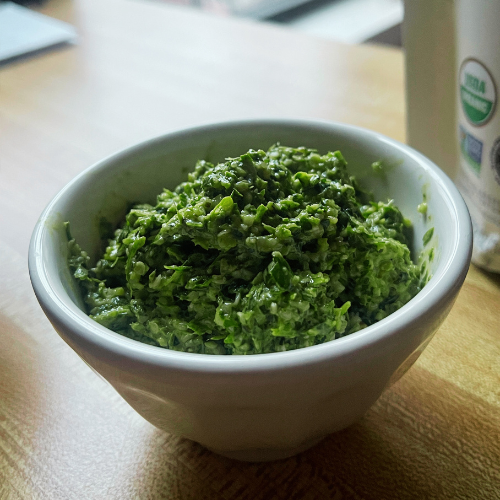
Cilantro Hemp Pesto

While most pesto recipes use traditional ingredients like pine nuts and parmesan cheese, this recipe (inspired by Cookie + Kate) offers an amazing dairy-free and nut-free alternative that goes best with my dietary preferences. Perfect to serve with any savory dish especially gluten-free pasta, tostones, and salads! It’s shocking how easy it is to make. Enjoy!

INGREDIENTS
  • 2 cups cilantro, chopped (approx 1 large bunch)
  • 1/2 cup hemp seeds
  • 2 garlic cloves, finely chopped
  • 1/2 teaspoon sea salt
  • 2 – 3 tablespoons extra virgin olive oil

DIRECTIONS

  1. Chop cilantro, stems included.
  2. Add cilantro, hemp seeds and garlic to the food processor and process until finely chopped.
  3. Slowly drizzle in the olive oil as you continue to process until you reach desired consistency. For creamier texture, add more olive oil.
  4. Store in an airtight container and refrigerate. Consume within 5 days.

Easy Tostones

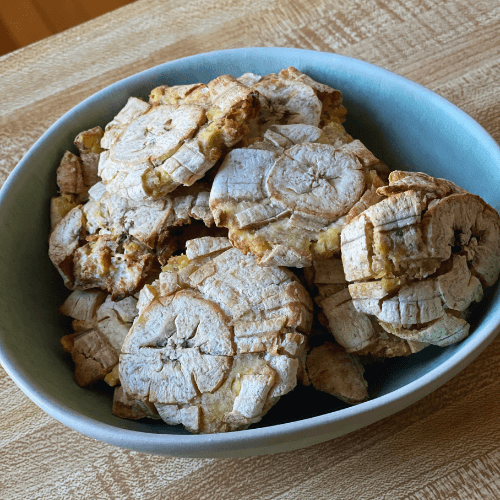
Plantains are a rich source of complex carbohydrates loaded with fiber that provide many benefits including micro-nutrients such as vitamin C, A, K, potassium and magnesium. They also have a low sugar content (only 3g per cup boiled) yielding an easy effect on blood sugar spike. This makes plantains a great way to get your healthy carbohydrates, depending on how you cook them. Most restaurants will deep fry them and make tostones (a Caribbean staple) to make them crispy and delicious but it’s definitely not the healthiest option…but I found a way!

This recipe has been my weekly go-to on days that I need the extra energy for a tough workout or run. When air fried, these tostones come out just as crispy and crunchy minus the oily texture you may find in restaurants. I pair them with eggs and veggies for breakfast or dip them in hummus and pesto as a snackl May take a few steps to make but you can meal prep them for the week and they provide all the crispy, crunchy, and salty goodness restaurant-made tostones give without the grease and guilt. Give them a go!


INGREDIENTS: 

  • 6 green plantains
  • 4 tablespoons avocado oil
  • 2 tablespoons sea salt


DIRECTIONS:
  1. Cut plantains in 2-inch width slices and place in a medium bowl.
  2. Drizzle 2 tablespoons of avocado oil and season lightly with salt.
  3. Place in the air fryer for 10 minutes at 400°F.
  4. Remove from the air fryer and place individual pieces between 2 sheets of wax paper. Using the bottom of a cup, press down with medium pressure to gently smash plantain into a flat shape.
  5. Toss all pieces back into the bowl and coat with remaining avocado oil.
  6. Place back into the air fryer for another 10 minutes.
  7. Remove immediately and season with a little bit more salt while the plaintains are still moist.

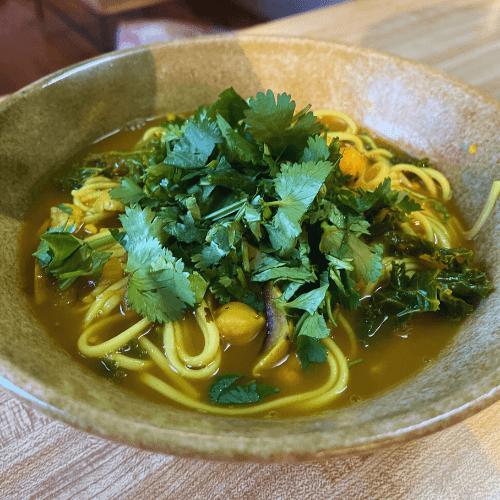
WARMING AYURVEDIC TURMERIC NOODLE SOUP

In Ayurveda, turmeric and ginger are valued for their therapeutic effects. They aid the body in balancing and naturally healing itself. When my immune system is being tested this is my go to! A bowl of this restorative ginger-turmeric broth is so nourishing and warm, I immediately feel that I’m doing something great for my body to recover.

Once the broth is prepped, its versatility allows me to add what I crave the most in noodle soups. I usually go for mushroom and greens but bok choy, broccoli, eggplant, shredded chicken and carrots also make great additions.  This soup is so delish that you’ll find every reason to make this, even if you’re not feeling under the weather. Give it a try!


INGREDIENTS: 

  • 4 cups filtered water
  • 4 cups veggie broth
  • 1 8oz package of Eden Buckwheat Soba Noodles
  • 1 can chickpeas
  • 2 handfuls of kale, stems removed
  • 1 cup of shiitake mushrooms
  • 1 medium red onion, diced
  • 1/4 cup cilantro, chopped
  • 1 tablespoon freshly grated ginger
  • 2 tablespoons garlic, finely chopped
  • 2 tablespoons avocado oil
  • 2 teaspoons ground turmeric
  • 1 teaspoon cumin powder
  • 1 teaspoon apple cider vinegar
  • 2 teaspoon salt
  • 1/4 teaspoon cayenne powder


DIRECTIONS:

  1. In a large pot or dutch oven, saute onion in 1 – 2 tablespoons avocado oil over medium heat for 5 minutes until fragrant and golden. Add ginger, garlic, and turmeric powder and saute for 2 – 3 minutes until the garlic is fragrant and golden. Add cumin and continue to stir for another minute.
  2. Add water, stock and salt. Bring to a simmer. Add apple cider vinegar and cayenne powder. Taste and adjust salt and spice level to your liking. This makes a flavorful base to add what you like. 
  3. Separately cook buckwheat soba noodles. Drain and set aside.  
  4. While noodles are cooking, add shiitake mushrooms, chickpeas, and kale to the broth and simmer for 5 minutes, stirring frequently. 
  5. Toss cooked noodles in the broth mixing all ingredients together. Serve in a bowl and garnish with fresh cilantro and black pepper.

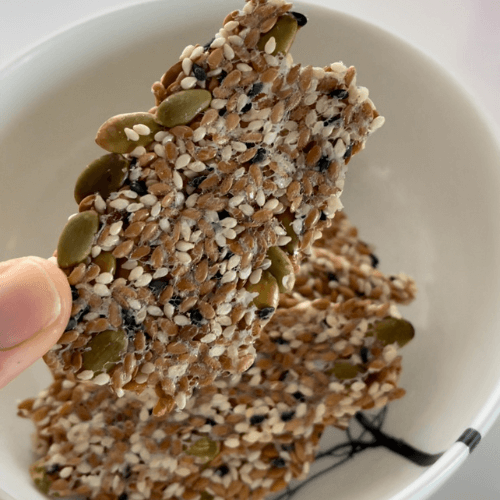
Flaxseed Crackers (Gluten-Free)

Most flaxseed crackers you find at the market contain so many unnecessary ingredients that help them keep a longer shelf life. That’s why I love these gluten-free flaxseed crackers inspired by Goop. With a few simple and all whole food ingredients, they make a delicious and crunchy savory snack that aligns seamlessly with my nutrition. You can pair them with a dip or simply enjoy them on their own.


INGREDIENTS:

  • Extra virgin olive oil
  • 1 cup flaxseeds
  • 1 cup raw pumpkin seeds
  • 1/2 cup raw black sesame seeds
  • 1/2 cup raw sunflower seeds
  • 2 tablespoons arrowroot powder
  • 1 cup boiling water
  • Everything Bagel spice seasoning


DIRECTIONS:

  1. Preheat oven to 350°F. Line a sheet tray with a piece of parchment paper. Lightly drizzle a little olive oil on the parchment paper so the crackers don’t stick. Mix seeds and arrowroot powder together.
  2. Carefully add the water and mix to combine. Once fully incorporated, spread the seed mixture into the pan in one even layer. Season the top of the seeded mixture with the everything spice seasoning and bake for about 1 hour until completely dried and crunchy.

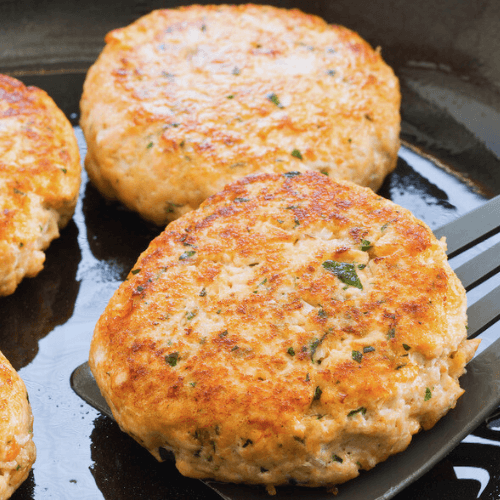
Super Salmon Burgers (Gluten + Dairy Free)

This is such a great and simple recipe. Inspired by Food Network, I made a few ingredient modifications to fit my dietary and nutrition preferences. Loaded with healthy fats and lots of flavor, these burgers make a great addition to any dinner. Also great as a meal prep entree served with a large green salad or in a hearty bowl. Enjoy!

SERVINGS: 4        PREP TIME: 15 minutes     COOK TIME: 10 minutes

INGREDIENTS:

  • 1 1/4 pounds center cut salmon fillet, skin and pin bones removed
  • 2 tablespoons dijon mustard
  • 1 tablespoon mayonnaise
  • 1 tablespoon lemon juice
  • 1/2 teaspoon grated lemon zest
  • pinch of cayenne pepper
  • 2 scallions, chopped
  • 1/4 cup cilantro, chopped
  • 1 cup crushed gluten free crackers (I love Artisan Nut Thins)
  • sea salt and ground black pepper
  • avocado oil
  • 4 gluten free buns or lettuce leaves


DIRECTIONS:

  1. In a food processor, grind gluten free crackers into a coarse breadcrumb texture.
  2. Cut 3/4 of the salmon into 1/4-inch pieces. Put in a large bowl. Cut the rest of the salmon into chunks; transfer the chunks to a food processor along with the mustard, mayonnaise, lemon juice, lemon zest and cayenne. Pulse to make a paste. Add the pureed salmon mixture to the bowl with the diced salmon. Add the scallions, 3 tablespoons cracker crumbs, 1/2 teaspoon salt, and black pepper to taste. Gently mix until all combined.
  3. Line a baking sheet with parchment paper and brush with avocado oil. Divide the salmon mixture into 4 mounds on the parchment paper. With damp hands, pat into 4-inch-wide, 3/4 inch-thick patties. Cover loosely with plastic wrap and refrigerate for at least 30 minutes.
  4. Preheat the broiler. Spread the remaining breadcrumbs on a plate. Cover both sides of the salmon patties generously in the crumbs. Heat avocado oil in a large nonstick or cast iron skillet over medium-high heat. Add the patties and cook until browned on the bottom, 3 – 4 minutes, adjusting the heat if necessary. Turn and cook until the other side is browned and the patties feel springy in the center (3 – 4 more minutes). Transfer to a paper towel-lined plate to drain. Season with salt and pepper.
  5. Serve the patties on gluten free buns or lettuce wraps and top with chipotle mayo and your favorite burger toppings.

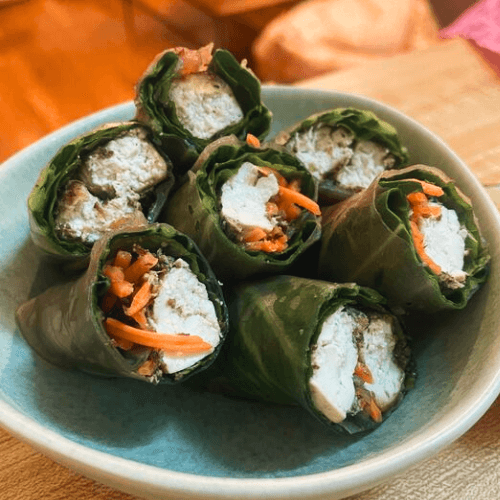
Tofu and Bok Choy Rolls

I am a huge fan of Vietnamese fresh summer rolls but it’s hard to find one that’s vegetarian and with bok choy so had to create my own. This does take a little precision with the wraps but you’ll get the hang of it and it actually becomes fun to make. Feel free to add more herbs and veggies (red pepper, spinach leaves, thyme) to your liking.

Makes a great appetizer or snack especially when you’re on the go. Give it a try and let me know what you think! Enjoy!

SERVINGS: 8 – 10 rolls       PREP TIME: 15 minutes     COOK TIME: 15 minutes

INGREDIENTS:  

FOR THE TOFU:

  • 16 oz organic extra firm tofu
  • 4 tablespoons of flax meal
  • 2 tablespoons avocado oil
  • 2 tablespoons coconut aminos
  • coarse ground black pepper

FOR THE ROLLS:

  • Vietnamese brown rice wrapper
  • 2 bunches of bok choy
  • 4 – 6 sprigs of fresh mint
  • 4 – 6 sprigs of fresh basil
  • 1/4 cup cilantro, leaves only
  • 1/4 cup shredded carrots


DIRECTIONS:

  1. Remove tofu from packaging and wrap with paper towel. Gently press to remove excess water. You can also sprinkle salt on the tofu and let it sit for 30 minutes to dehydrate.
  2. In a double boiler, steam bok choy for 5 minutes. You can skip this part and enjoy the bok choy raw. Cut the tough white ends off so only the green leaves are left.
  3. Cut the tofu into 2-inch rectangles and place all in a large bowl. Add all other tofu ingredients and gently mix with your hands, covering each piece. There may be some clumps from the flax meal so make sure to spread those evenly around.
  4. Cook in air fryer for 15 minutes at 350°F, shaking the pan half way through.
  5. Dip one wrapper in warm water for a few seconds. Lay flat on surface and start to build your roll. Place 1 bok choy leaf, few basil, mint, and cilantro leaves, shredded carrots, and 2 tofu pieces laid out side by side horizontally.  Fold in the sides of wrapper over the ingredients and the tops of the wrapper slightly in to give yourself enough room to roll. Start rolling! Don’t be afraid to put a bit of pressure to tighten up the roll.
  6. Cut each roll in half (as shown in pic) or enjoy as a whole. Serve with coconut aminos or this delicious peanut sauce.

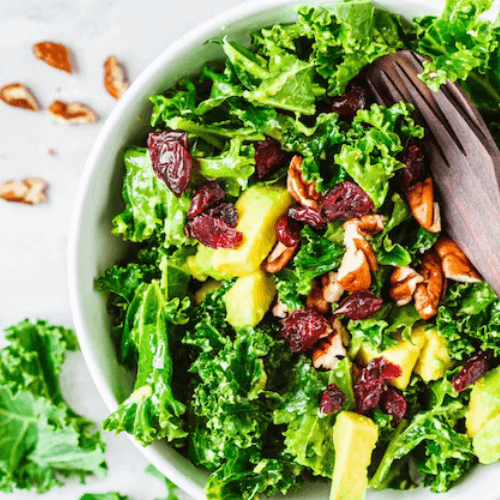
Kale and Brussels Sprouts Salad

One of my favorite recipes. Lots of crunch with a tart flavor, this salad is always a hit and makes a great side dish to any meal. Inspired by WellPlated, I made some small modifications to make this dairy free and with my favorite ingredients. Feel free to sub out with your choice of nuts and dried fruit. Enjoy!

SERVINGS: 6 – 8       PREP TIME: 10 minutes     COOK TIME: 8 – 10 minutes

INGREDIENTS:

FOR THE SALAD:
  • 1 1/2 cups raw walnut halves or raw whole almonds
  • 1 large bunch curly kale (approximately 1 1/4 lbs) stems removed and finely chopped
  • 1/4 teaspoon kosher salt
  • 16 oz Brussels sprouts
  • 3/4 cup dried cherries
  • Avocado oil
FOR THE DRESSING:
  • 1/4 cup extra virgin olive oil
  • 1/3 cup fresh lemon juice about (1 1/2 medium lemons)
  • 2 teaspoons Dijon mustard
  • 1 teaspoon pure maple syrup
  • 3/4 teaspoon kosher salt
  • salt and ground black pepper


DIRECTIONS:

1. Preheat the oven to 350°F. Spread the nuts into a single layer on parchment paper. Toast in the oven for 8 – 10 minutes, tossing once halfway through. Remove from oven and roughly chop.
2. Meanwhile, place the kale in a large bowl. Lightly sprinkle with the avocado oil and salt . Massage the kale with your hands by grabbing large handfuls a few at a time and squeezing gently until the kale is soft and darker. This will help to soften kale for easier consumption and digestion.
3. Cut the bottom ends off of the Brussel sprouts. Then shred by using a food processor or chopping with a sharp chef’s knife.  Place the shreds in a bowl with the kale, then toss and fluff them with a fork or your fingers.
4. In a small mason jar, shake all dressing ingredients. You can also use a small bowl and whisk all ingredients together.
5. Pour half of the dressing over the salad, then toss to combine. Sprinkle the cherries and chopped nuts over the top, then lightly toss again. Drizzle with remainder of dressing.